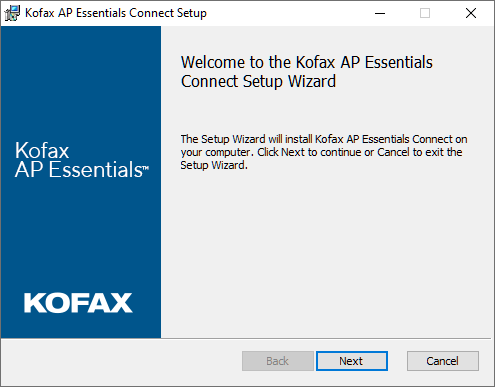
Tungsten AP Essentials Connect
Tungsten AP Essentials Connect is a program you can install on a local computer to perform a number of tasks, such as uploading documents to AP Essentials. It is an alternative to uploading documents using the web interface in AP Essentials. Using AP Essentials Connect, you can upload documents automatically, reducing the effort of uploading documents one by one.
AP Essentials Connect runs as a service in the background, so it is not necessary to start a program each time you want to upload documents. Instead, you simply move the files you want to upload to the folders you specify during the installation setup.
AP Essentials Connect can be beneficial if you want to:
- Upload large numbers of documents.
- Automate the process of uploading documents.
- Download output data from AP Essentials.
- Automatically register supplier documents in external systems.
Note that the user interface for AP Essentials Connect is currently only available in English.
AP Essentials Connect system requirements
AP Essentials Connect supports the following operating systems:
- Windows 11
- Windows 10
- Windows 8.1
- Windows Server 2019 Standard
- Windows Server 2019 Datacenter
- Windows Server 2016
AP Essentials Connect requires the following:
- Microsoft .NET Framework 4.8.
- An HTTPS connection that uses port 443.
Install AP Essentials Connect
If you use a proxy connection to connect to the Internet, ensure you specify the Windows proxy settings before you install AP Essentials Connect.
To install AP Essentials Connect:
-
Download and run the setup file from the URL that corresponds to your
location. Note that an HTTPS connection on port 443 is required to download
the installation. After the installation, the connection is required to
receive program updates.
- Europe: https://production.readsoftonline.com/install/connect
- Australia: https://au.readsoftonline.com/install/connect
- US: https://us.readsoftonline.com/install/connect
-
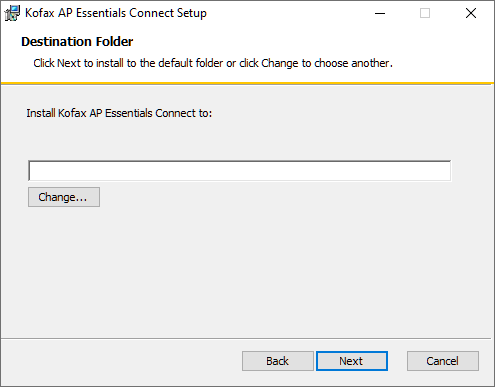
Specify the installation folder and select Next to continue.
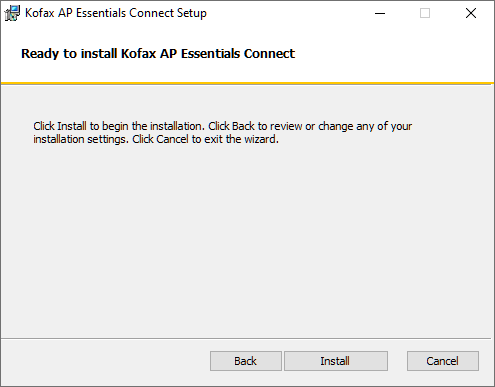
-
Select Install to confirm your
settings and install AP Essentials Connect.
-
After the installation, select Finish to launch AP Essentials Connect and run the setup wizard.

Troubleshoot the installation
When running the installation, some computers display a message that states, "Installation directory must be on a local drive." If you receive this message, run this command as an administrator in Windows Command Prompt:
msiexec /i "C:\Program Files (x86)\Tungsten\AP Essentials Connect\Tungsten AP Essentials Connect.msi" WIXUI_DONTVALIDATEPATH="1"
Use AP Essentials Connect with a proxy server
To use AP Essentials Connect with a proxy server, you must adjust the Local Area Network settings for the computer that runs the AP Essentials Connect service. To configure the Windows settings:
- Navigate to the Windows Internet Options.
-
Select the Connections tab
in the dialog that appears, and select LAN Settings.
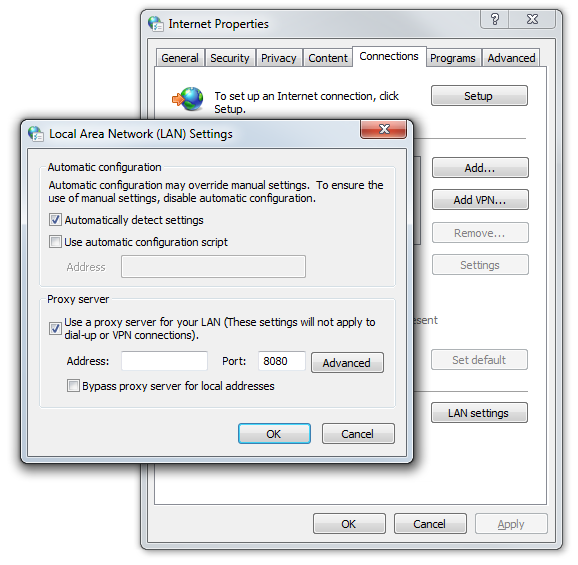
- In the dialog that appears, select Automatically detect settings and Use a proxy server for your LAN.
- Use the Proxy server settings to specify the details of your proxy server.
Proxy server authentication
If your proxy server requires authentication, you can edit two files to instruct AP Essentials Connect to use the credentials of the current Windows user for authentication.
-
Open the following files in a text editor:
- C:\Program Files (x86)\Tungsten\AP Essentials Connect\ReadSoft.Connect.Host.exe.config
- C:\ProgramData\ReadSoft Software Services AB\ReadSoftOnlineConnect\Bin\App.config
-
In each file, locate the <system.net>
element and add the following line:
<defaultProxy useDefaultCredentials="true" />
If there is no <system.net> element, add the following to the <configuration> element.
<system.net>
   <defaultProxy useDefaultCredentials="true" />
</system.net>