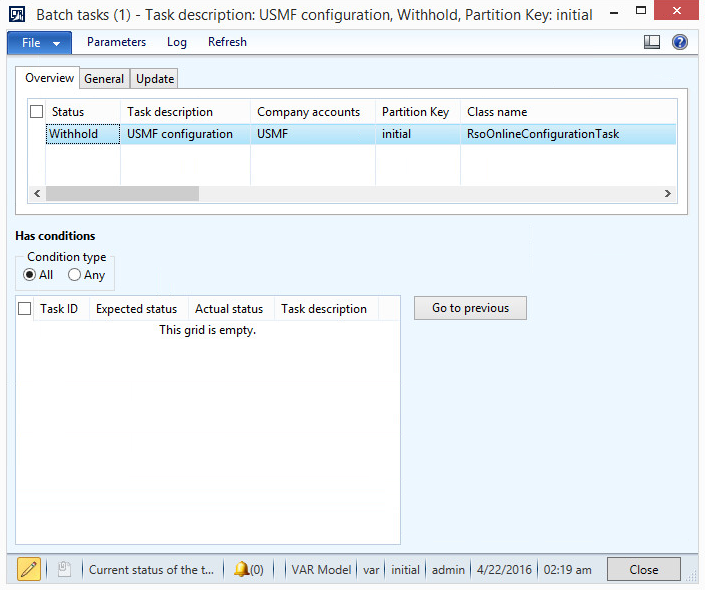
Configuring Dynamics AX 2012 (embedded)
Previously, Tungsten AP Essentials Connect was required to specify Dynamics AX integration settings. Now you can configure Dynamics AX to push the settings to the target system service in Tungsten AP Essentials instead. To configure the Dynamics AX integration without using AP Essentials Connect:
- Configure legal entities in Dynamics AX 2012.
- Import the AX model file.
-
Define
three batch tasks in Dynamics AX 2012:
- RsoOnlineConfigurationTask - synchronizes settings with Tungsten AP Essentials.
- RsoOnlineMasterDataSyncTask - synchronizes master data with Tungsten AP Essentials.
- RsoOnlineDocumentsProcessorTask - synchronizes documents with Tungsten AP Essentials.
- Specify the target-system settings in Tungsten AP Essentials.
Configure legal entities in Dynamics AX 2012
-
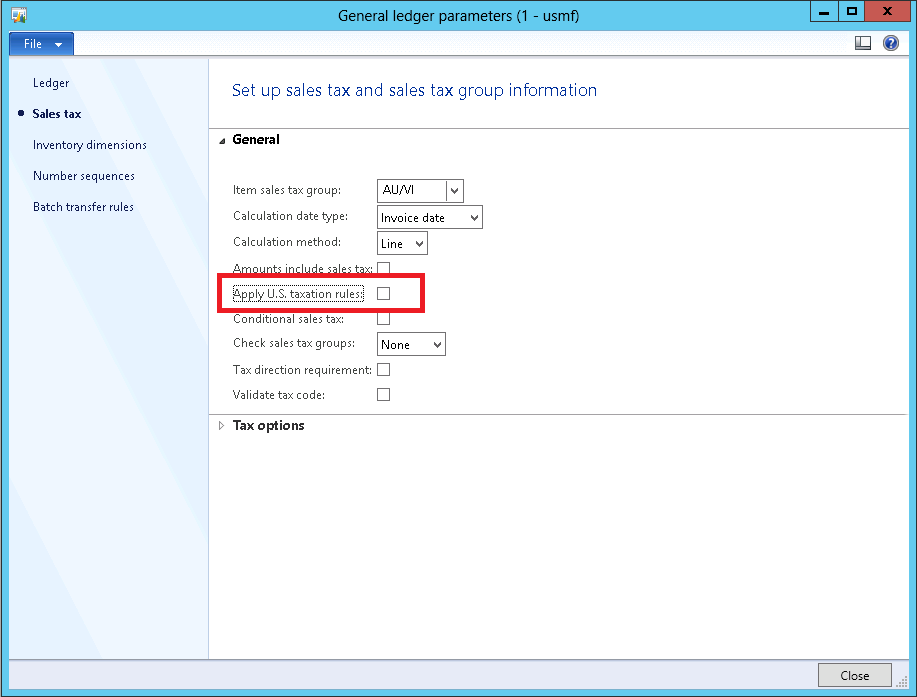
If your company does not operate in the United States, disable US taxation rules for non-US companies by deselecting
Apply U.S. taxation rules ().
-
Navigate to
General Ledger and create journals. For processing non-PO invoices using Invoice Register and Approval journals:
- Make sure you have a journal with the Journal type set to Invoice
register.

- Make sure you have a journal with the Journal type set to
Approval.

For processing non-PO invoices using Invoice journals:
- Make sure you have a journal with the Journal type set to Vendor
invoice recording.

- Make sure you have a journal with the Journal type set to Invoice
register.
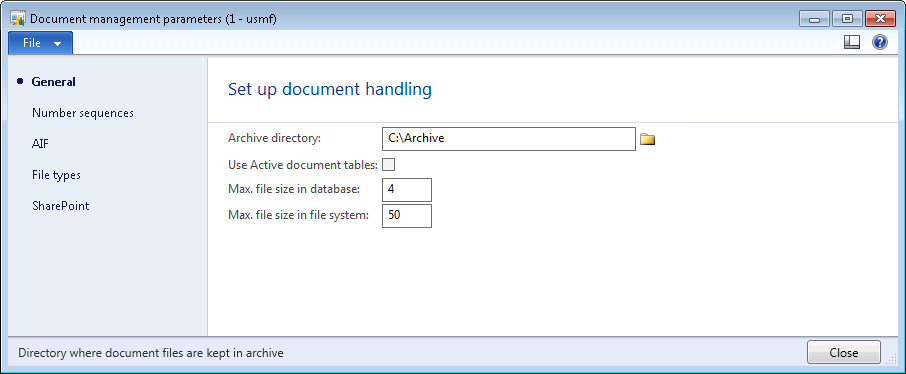
- Create a folder where you want to save invoice images and specify this folder as the Archive directory ().
-
If
"Use Active document tables" is enabled in Dynamics AX (Document management parameters), make sure that the
correct tables are specified in the Active document tables list ().
Reference table ID Table name 177 Inventory transactions 211 Ledger journal table 212 Journal lines 440 Posted sales tax 482 Audit trail 491 Vendor invoice journal 506 Vendor transactions 553 Inventory transaction posting 1425 Vendor invoices 3119 General journal account entry 3123 General journal entry 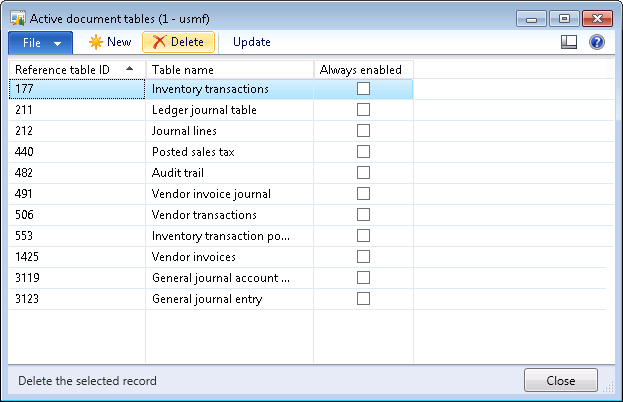
-
Navigate to
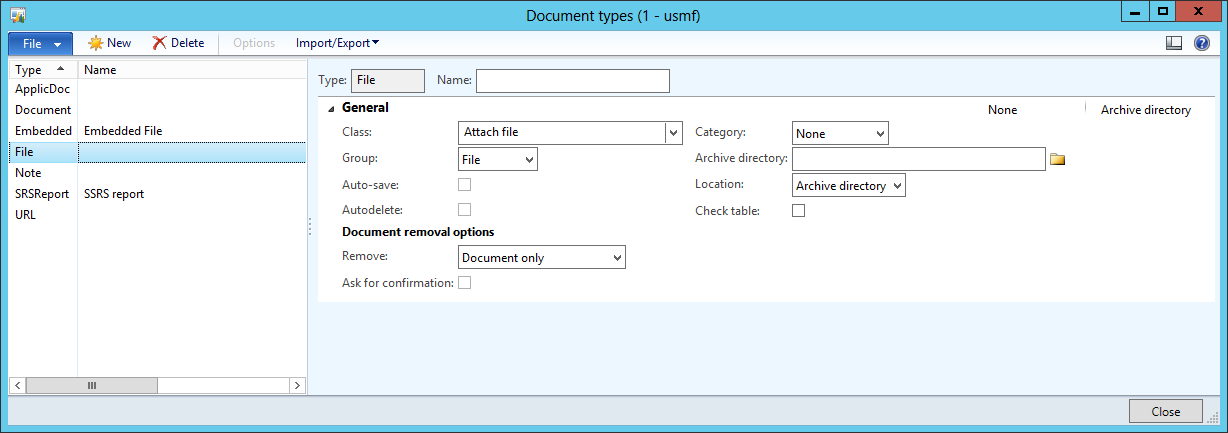
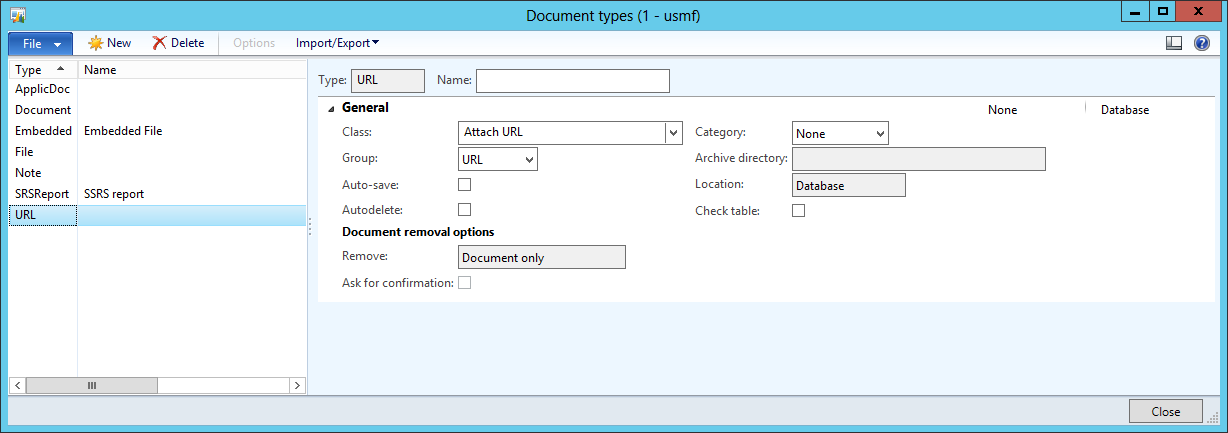
and make sure File and URL document types are specified.
Make sure the File document type is specified.
Make sure the URL document type is specified.
Import the AX model file
- Close Microsoft Dynamics AX.
- Download this ZIP file.
- Right-click the ZIP file, select Properties and click Unblock.
- Extract the ZIP file and run Import 2012 AXModel.bat as administrator by right-clicking the file and selecting Run As Administrator.
- Restart the Windows Service, Microsoft Dynamics AX Object Server [version]-MicrosoftDynamicsAX.
- Run Microsoft Dynamics AX.
- When a dialog states that “The model store has been modified,” select Skip and click OK.
-
Press Ctrl + D to open AOT and click the Project button.

- Expand the Shared node and double-click RsoIntegration to open the project.
-
Select
Compile (Build menu) to compile the project.

-
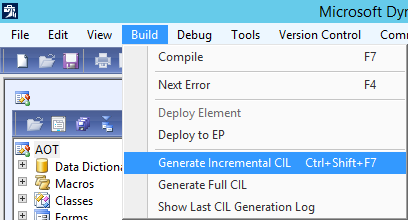
Select
Generate Incremental CIL (Build menu).
Defining batch tasks
Repeat these steps for each batch task mentioned in step 2 above.
- Using Dynamics AX, navigate to .
- Select to create a new batch job.
- Type a Job description for the new batch job that appears and save the batch job (Ctrl + S).
- Click View tasks and select to create a new batch task.
- In the dialog that appears, type a Task description and specify Company accounts.
- Specify the Class name that corresponds to the batch task that you want to define: RsoOnlineConfigurationTask, RsoOnlineMasterDataSyncTask or RsoOnlineDocumentsProcessorTask.
- Save the task and click Parameters.
- Use the dialog that appears to specify Tungsten AP Essentials credentials for an administrator account.
- Close the Batch tasks dialog and return to the Batch job dialog.
-
Click
Recurrence. In the dialog that appears, adjust the settings according to
the current task you are specifying:
Task Recommended recurrence RsoOnlineConfigurationTask Run this task once (no recurrence). RsoOnlineMasterDataSyncTask Every 4 hours. RsoOnlineDocumentsProcessorTask Every 5 minutes. - Click OK to save the settings.
-
Make sure the newly created batch job is selected in the
Batch job dialog and select
and use the dialog that appears to change the status to
Waiting
Repeat the procedure above for each batch task that you need to define: RsoOnlineConfigurationTask, RsoOnlineMasterDataSyncTask or RsoOnlineDocumentsProcessorTask. After you run all the batches, you can specify the target-system settings in Tungsten AP Essentials.
The company account must match the External ID (External reference) of your Tungsten AP Essentials customer.
